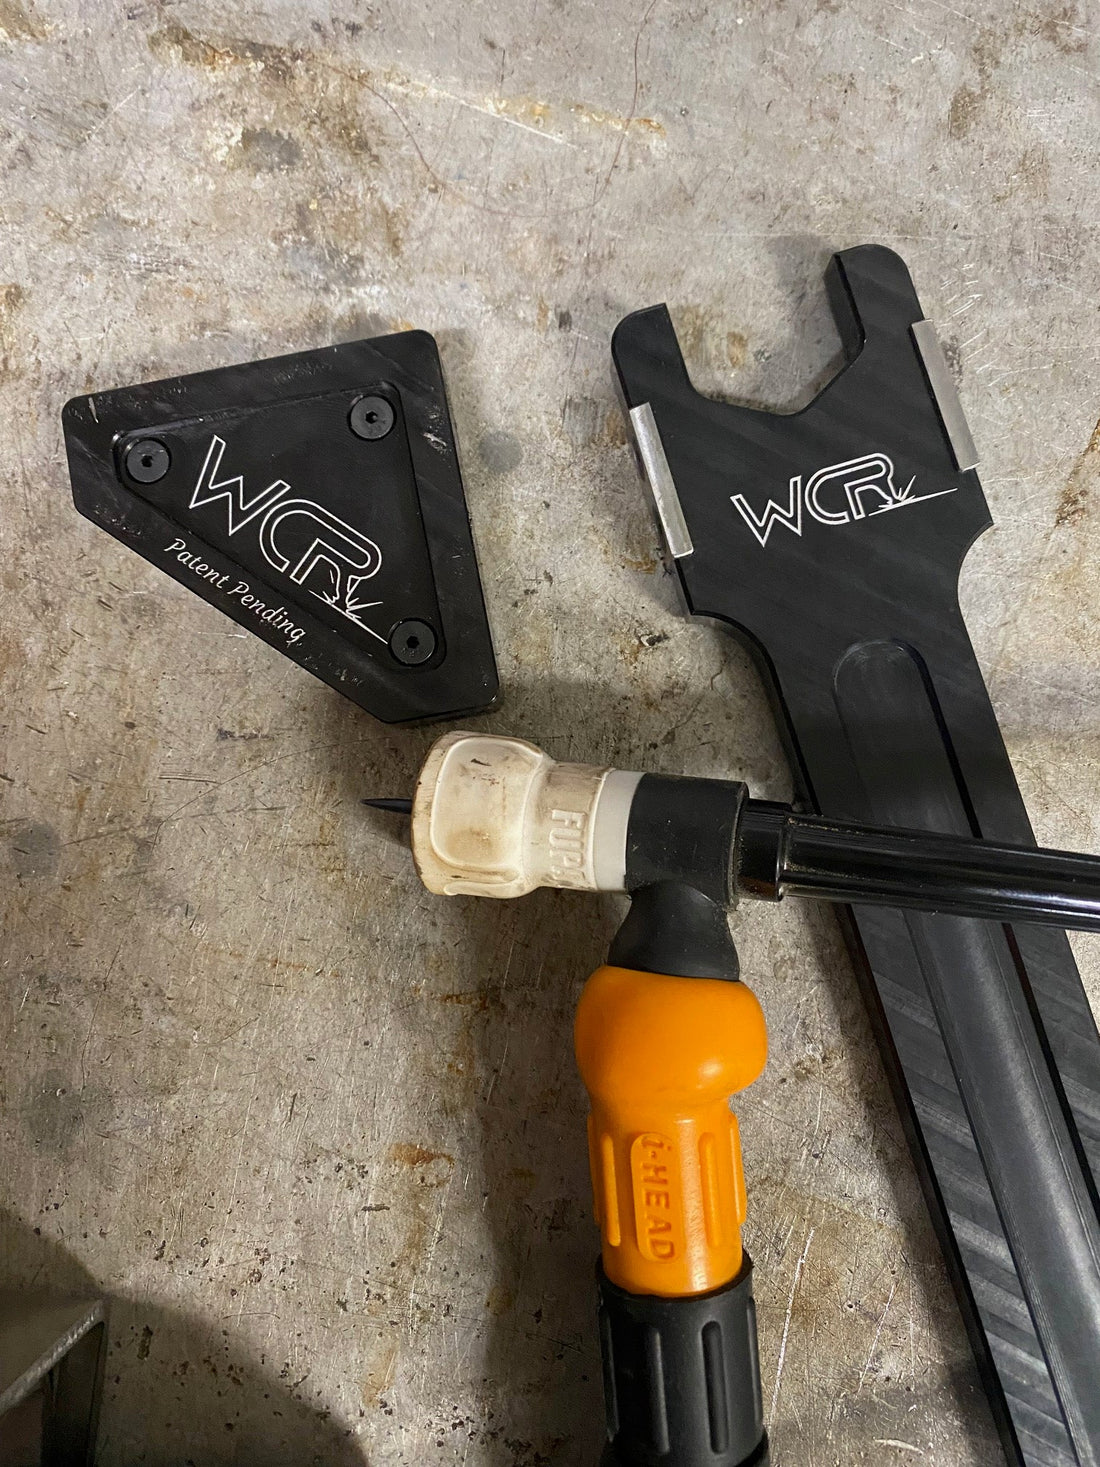
How to Use the TIG Welding Tungsten Stick-Out Gauge Block to Properly Set Tungsten Stick-Out for TIG Welding
When TIG welding, the length your tungsten electrode protrudes from the gas lens or collet body (known as tungsten stick-out) is a critical parameter. Too short, and you risk gas coverage issues and potential contamination; too long, and you lose control, risk tungsten oxidation, or get poor arc stability. The Working Class Royalty TIG Welding Tungsten Stick-Out Gauge Block is a simple, durable tool designed to take the guesswork out of this setup. Here’s how to use it properly — and why it matters.
What Is the Gauge Block & Why Use It
The Working Class Royalty gauge block is:
- CNC machined from 6061 aluminum, so it's durable, won’t melt like cheaper plastics or 3D‐printed parts. Working Class Royalty
- Made in the USA. Working Class Royalty
- Designed for easy and accurate repeatable tungsten stick-out measurement. Working Class Royalty
Using this gauge block helps ensure:
- Consistent welds from job to job
- Proper shielding gas coverage
- Lower chance of tungsten contamination or tip damage
- Repeatable performance especially when switching tungsten types, torch setups, or joint types
Step-by-Step: Using the Gauge Block
Here’s how to use the Working Class Royalty Tungsten Stick-Out Gauge Block properly for setting your tungsten stick-out:
- Grind your tungsten correctly first
- Make sure your tungsten is ground to the appropriate point or shape (e.g. balled, truncated, pointed) depending on the filler material and type of weld. Clean it of contaminants.
- Insert the tungsten loosely in the torch
- Install your tungsten in the collet or gas lens but don’t fully tighten. Leave a little wiggle so it can slide.
- Select the gauge hole corresponding to your gas lens / cup size
- The gauge block supplied has holes sized to match typical gas lens or cup diameters. You want to match the hole that your gas lens or cup uses so the tungsten will fall (or rest) into place properly. Working Class Royalty
- Lower the torch or bring the tungsten over the gauge block
- Hold the torch so the tungsten is hovering over the matching hole in the block.
- Let the tungsten drop into the hole
- Gravity (or carefully lowering) will let the tungsten tip settle into the matching hole in the gauge block. Ensure it’s fully seated — that represents the correct stick-out for that size.
- Tighten the tungsten
- Once the tip is seated in the hole and stick-out is correct, tighten the collet or gas lens to lock the tungsten in place. Make sure you don’t change the stick-out while tightening.
- Double-check before welding
- If possible, visually confirm the stick-out after tightening. Sometimes tightening can pull tungsten in or push it out slightly. Accuracy here ensures repeatable welds.
- Adjust as needed for material & joint
- Based on what you see in the weld pool (penetration, arc stability, gas shielding), you may want to fine tune the stick out slightly (longer or shorter) but using the gauge block gives you a solid, repeatable baseline.
Common Mistakes & How the Gauge Block Helps Avoid Them
|
Mistake |
How It Hurts the Weld |
How Gauge Block Prevents It or Flags It |
|
Stick-out too short |
Poor gas coverage, contamination, tungsten oxidation, arc wandering |
If you think you have correct, but minus some - gauge shows you need more protrusion |
|
Stick-out too long |
Loss of arc stability, increased heat-affected zone, difficulty controlling bead, more spatter |
Gauge block stops you from “eyeballing” too long a stick out |
|
Forgetting to adjust when switching torch/cup size |
Inconsistent welds or unexpected defects |
Gauging every time provides consistency across setups |
Tips for Best Results
- Always clean your tungsten before using gauge block. Dirt or oxidation on the tip can affect seating.
- Maintain consistent gas flow rate matched to your torch and gas lens size. Proper stick-out depends also on stable gas shielding.
- Keep the gauge block clean. If material or weld spatters or oxidation build up in its holes, it can give false readings.
- If switching tungsten diameters, material, or welding different metals (e.g. steel vs aluminum), keep track of optimal stick-out settings—what worked, and when. Over time you’ll build a reference.
Why This Matters for Quality, Efficiency & Cost
- Weld Quality – Better penetration control, more uniform bead appearance, fewer defects (porosity, tungsten inclusion).
- Efficiency – Less time spent adjusting or re-doing welds due to inconsistent stick-out.
- Consumable Life – Tungsten lasts longer when it’s used and clamped properly. Less risk of overheating, contamination, or irregular tip wear.
-
Reproducibility – If you need multiple welds in different locations, or different operators, having a standard stick-out setting ensures more consistent results across jobs.
Conclusion
Using the Working Class Royalty TIG Welding Tungsten Stick-Out Gauge Block is a simple, low-cost way to improve consistency, weld quality, and operator confidence. By taking a few moments each setup to properly measure and set stick-out, you’ll avoid many of the common pitfalls in TIG welding. Once you make it part of your routine, you’ll start seeing better repeatability, less waste, and better overall welds.
